DIY Soundproofing: Pro-Tips for Maximizing Performance on a Budget
A logic-driven breakdown of DIY soundproofing for renters. Learn the golden ratio of 'Isolation vs. Absorption,' material specs for D-value improvement, and the 5-step protocol for blocking external noise in 2026.

Bottom Line: 90% of DIY soundproofing fails because creators try to block noise using ‘Acoustic Foam’ alone.
Sticking egg-crate foam on your walls will make your recordings sound “dead” (reduced reverb), but it will do virtually nothing to stop your neighbor’s low-frequency thumping. Real acoustic privacy is only achieved through a logical combination of “Isolation (Mass)” and “Absorption (Damping).”
This briefing outlines the 2026 protocol for securing a professional noise floor using off-the-shelf materials.
1. The Fundamental Equation: Isolation + Absorption = Silence
Before you buy a single item, internalize these definitions:
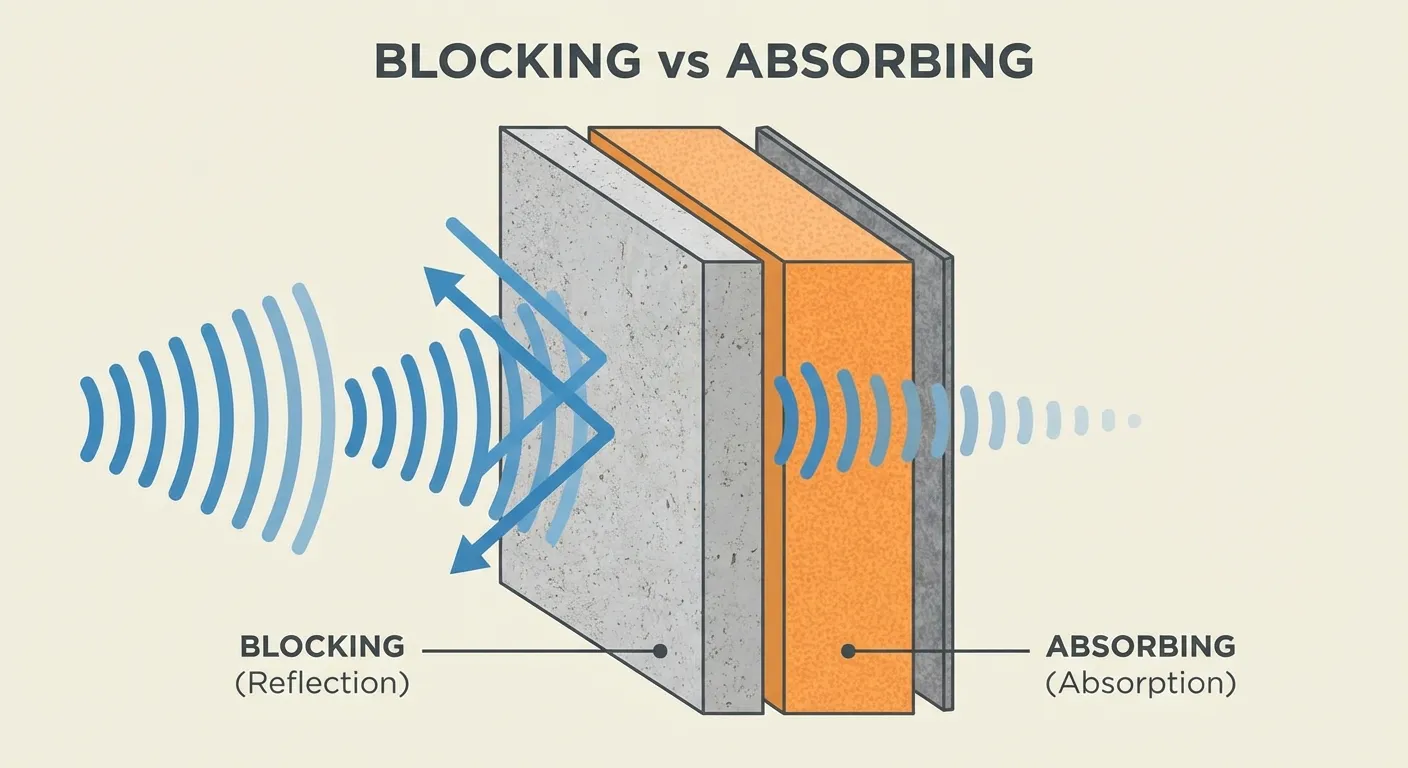
- Isolation (Blocking): Rebounding sound and preventing transmission. This requires Mass (Density). Think heavy vinyl sheets or lead-infused boards.
- Absorption (Damping): Sopping up internal reflections and converting them into heat. This requires Porous Structure (Fiberglass, Rockwool).
The Golden Rule: If you want to stop noise leakage, first build a wall of “Mass,” then layer your “Absorption” on the inside. Without this two-step architecture, your D-value (Sound Isolation Rating) will remain stagnant regardless of how much foam you use.
2. The 2026 “Renter-Safe” Installation Framework
As a creator in a rental property, your #1 priority is Restoration (Returning to Zero). Here is how to achieve performance without property damage.
I. The “Air-Gap” Window Strategy
80% of environmental noise enters through windows.
- DIY Fix: Create a rudimentary “Double Glazing” system using plastic corrugated boards (Pladan) layered with 1.2mm+ sound isolation sheets.
- The Secret: The “Air Gap” between the glass and your DIY panel provides an extra layer of decoupling. Tight seals are mandatory; a 1mm gap can negate 30% of your performance gain.
II. Freestanding Partition Walls
Never glue heavy sheets directly to the apartment wall.
- Protocol: Use tension poles (Labrico / Diawall) to create a temporary frame. Attach your Mass-Loaded Vinyl (MLV) and Rockwool Boards to this frame.
- Why: This creates a decoupled “Room-within-a-Room” effect that blocks structural vibrations more effectively than any direct mount.
III. The Floor Layering Stack
To stop “Footstep Noise” or chair movement from reaching the level below:
- Anti-vibration Pad: Decouple the structure.
- Sound Isolation Sheet: Add mass to the surface.
- Acoustic Carpet: Minimize surface reflections. Note: Inverting this stack will significantly reduce its effective TL (Transmission Loss).
3. Engineering-Grade Material Specs
Do not trust products marked “Soundproof” on massive marketplace sites without checking these metrics:
| Category | Recommended Specs | Recommended Material (Japan Example) |
|---|---|---|
| Mass Sheet | Face Density 2.0kg/㎡+ | Daiken Isolation Sheet 455H |
| Absorber | Density 40-80kg/㎥ | MG Board (Rockwool) / GC Board |
| Sealant | E-type or P-type Rubber | Weather-proof adhesive gaskets |
4. Why “Air-Tightness” is Your Best Asset
In acoustic engineering, a gap is a “Critical Error.” A 1% gap in your door seal can reduce the effective isolation of a heavy door by over 50%. Before spending ¥100k on high-end boards, spend ¥1k on high-quality Door Gaskets. If air can pass, sound can pass.
5. Summary: The Agile Approach to Silence
Soundproofing your studio is an iterative process. Start with the “Air Leaks” (Windows and Doors), measure the result using a dB meter app, and then progress to the “Mass Additions” (Walls and Floors).
By building your creative walls with logic and sweat, you ensure a noise floor that supports your growth—not just your silence.
Caution: Always verify floor load limits (Standard 180kg/㎡ in JP) and ensure proper ventilation to manage CO2 levels during long recording sessions.