Compact Soundproof Booth Installation: Engineering Guide to Avoid Setup Disasters
A professional engineer's guide to choosing and installing compact soundproof booths for streaming. Learn critical checkpoints for floor loading, clearance, and millimeter-accurate logistics to avoid delivery failures.
Bottom Line: The success of a compact soundproof booth depends on two factors: “Millimeter-accurate spatial measurement” and “Understanding floor loading limits.”
In the age of home streaming, soundproof booths are becoming essential. However, the most common failures aren’t about acoustic performance—they are physical disasters: “The panels wouldn’t fit through the door” or “The booth was too heavy for the apartment floor.” As an engineer, I view a soundproof booth not as furniture, but as high-precision equipment requiring a rigorous site survey.
This guide provides an action-oriented checklist to ensure a seamless installation process.
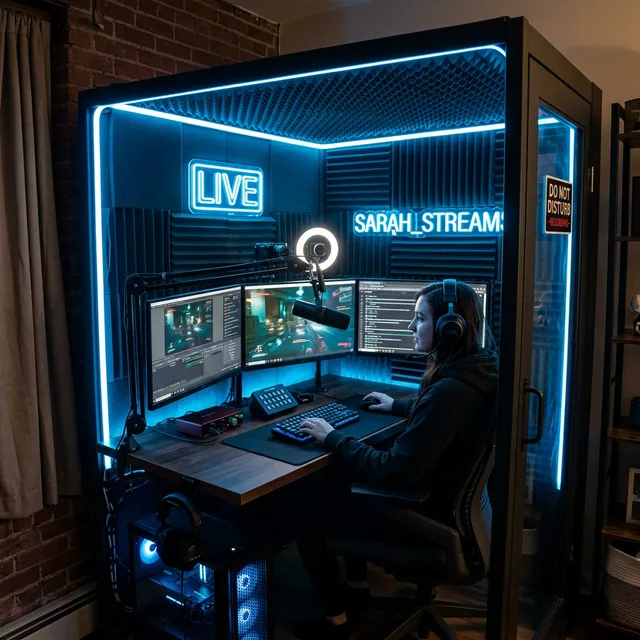
Compact Booth Categories & Recommended Specs
Depending on your content, you must balance sound insulation (D-value) with internal workspace.
| Content Category | Recommended Space | Insulation Rating | Key Examples |
|---|---|---|---|
| Vocal / Voiceover | 0.8 – 1.0 tatami (approx. 15-20 sq ft) | Dr-35 to Dr-40 | Yamaha Cefine NS / ISOVOX 2 |
| Game Streamer | 1.2 – 1.5 tatami (approx. 20-25 sq ft) | Dr-30 to Dr-35 | OTODASU II / Danbochi Wide |
| High Fidelity / ASMR | 1.5 tatami+ (approx. 25 sq ft+) | Dr-40 | Yamaha Cefine NS (High-insulation) |
Engineer’s Advice: For gaming, you need at least 1.2 tatami. In a 0.8-tatami booth (phone-booth size), you won’t have enough elbow room for mouse flicks, leading to “clanking” noises against the inner walls during intense matches.
Logistics: The “Last Mile” Failure Points
“It fit through the front door, but couldn’t turn the corner in the hallway.” This is the classic installation nightmare.
1. Effective Clearance (Width & Height)
Don’t just measure the door frame. Measure the effective clearance—the width available after accounting for door handles and the door’s own thickness when open.
- Critical: Check the height of your ceiling lights. A booth might clear the ceiling but hit a pendant light fixture during assembly.
2. Elevator Diagonal Measurement
For booths larger than 1.2 tatami, the floor panels are often large. Ensure they can fit into your elevator. If the panel is wider than the elevator door, check if it can be tilted and fit along the elevator’s internal diagonal.
3. Floor Loading: The 180kg/m² Rule
Standard Japanese apartments have a floor load limit of 180kg per square meter.
- The Risk: A professional booth (like Yamaha Cefine NS) can easily exceed 300kg.
- The Solution: Use a reinforced base panel or heavy-duty plywood to distribute the weight across a larger surface area to prevent floor sagging.
Post-Installation Dead Zones: Managing “Dead Sound” and “Heat”
Small enclosures suffer from acoustic anomalies like standing waves and flutter echoes.
- Solution: Strategic Absorption: Place acoustic panels behind the microphone and on the wall you face. Avoid covering every square inch; over-absorbing high frequencies makes your voice sound muffled and unnatural (too “dead”).
- Solution: Heat Management: Small booths become ovens within minutes. Never disable the ventilation fan during streams. Instead, invest in a silent duct system or use AI noise reduction to filter out the fan hum.
Summary: Measurement is the Best Soundproofing
- Verify floor load and ceiling height before pressing “Buy.”
- Measure every “minimum width” from the entrance to the installation spot.
- Factor in PC heat and ventilation as part of your system design.
Only after clearing the physical logistics can you unlock the perfect acoustic environment. Stop guessing and start measuring.
Related Posts
- → Room Selection: “Choosing a Gamer’s Soundproof Room 2026: Pro Engineer’s Rules”
- → Vibration Control: “Professional Soundproof Mat Guide for Apartment Living”
- → Price Trends: “How Much Does a Soundproof Room Cost? 2026 Price List”
- → Rental Contracts: “Soundproofing in Apartments: Essential Contract Checks”